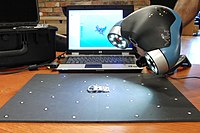
Photo from wikipedia
Automated quality control in industrial environments requires sensors to obtain information about the manufactured products. Visual sensors are crucial for this task. In industrial environments, line-scan cameras are commonly used… Click to show full abstract
Automated quality control in industrial environments requires sensors to obtain information about the manufactured products. Visual sensors are crucial for this task. In industrial environments, line-scan cameras are commonly used for their ability to acquire images from fast moving objects at high resolution. However, the information in the images must be translated from image coordinates to scene coordinates. This work proposes a calibration procedure for line-scan cameras particularly designed for industrial environments. The proposed approach is based on a novel calibration target that can be used in multicamera architectures, a common scenario found in many product inspection pipelines. Industrial environments are very challenging for visual sensors, as they are affected by harsh conditions. The calibration procedure integrates an outlier rejection method to deal with these issues. In addition, the calibration target includes a large number of feature points. Consequently, the removal of some of these features does not affect the performance of the calibration. Additional signal processing methods are proposed to extract features from the images. The calibration procedure uses data acquired from multiple observations by optimizing the reprojection error, resulting in an accurate and robust method, suitable for industrial environments. The design of the calibration target, the increased number of features, the outlier rejection method, and other contributions of this work result in an accurate estimation of the camera parameters. The proposed method is validated using synthetic and real data acquired with a commercial line-scan camera.
Journal Title: IEEE Transactions on Instrumentation and Measurement
Year Published: 2022
Link to full text (if available)
Share on Social Media: Sign Up to like & get
recommendations!